POM
在 pom.xml 文件中新增 com.alibaba:druid 和 mysql:mysql-connector-java 依赖
1 2 3 4 5 6 7 8 9 10 <dependency > <groupId > com.alibaba</groupId > <artifactId > druid</artifactId > <version > 1.1.6</version > </dependency > <dependency > <groupId > mysql</groupId > <artifactId > mysql-connector-java</artifactId > <version > 5.1.46</version > </dependency >
配置数据库连接
配置数据库连接 jdbc.properties ,配置代码如下:
1 2 3 4 5 6 7 8 9 10 11 12 13 14 jdbc.driverClass =com.mysql.jdbc.Driver jdbc.connectionURL =jdbc:mysql://192.168.75.134:3306/myshop?useUnicode=true&characterEncoding=utf-8&useSSL=false jdbc.username =root jdbc.password =123456 jdbc.pool.init =1 jdbc.pool.minIdle =3 jdbc.pool.maxActive =20 jdbc.testSql =SELECT 'x' FROM DUAL
Spring 集成 Druid
创建一个名为 spring-context-druid.xml 的 Spring 配置文件,内容如下:
1
2
3
4
5
6
7
8
9
10
11
12
13
14
15
16
17
18
19
20
21
22
23
24
25
26
27
28
29
30
31
32
33
34
35
36
37
38
39
40
41
<?xml version="1.0" encoding="UTF-8"?> <beans xmlns ="http://www.springframework.org/schema/beans" xmlns:xsi ="http://www.w3.org/2001/XMLSchema-instance" xmlns:context="http://www.springframework.org/schema/context" xsi:schemaLocation="http://www.springframework.org/schema/beans http://www.springframework.org/schema/beans/spring-beans.xsd http://www.springframework.org/schema/context http://www.springframework.org/schema/context/spring-context.xsd"> <context:property-placeholder ignore-unresolvable ="true" location ="classpath:jdbc.properties" /> <bean id ="dataSource" class ="com.alibaba.druid.pool.DruidDataSource" init-method ="init" destroy-method ="close" > <property name ="driverClassName" value ="${jdbc.driverClass}" /> <property name ="url" value ="${jdbc.connectionURL}" /> <property name ="username" value ="${jdbc.username}" /> <property name ="password" value ="${jdbc.password}" /> <property name ="initialSize" value ="${jdbc.pool.init}" /> <property name ="minIdle" value ="${jdbc.pool.minIdle}" /> <property name ="maxActive" value ="${jdbc.pool.maxActive}" /> <property name ="maxWait" value ="60000" /> <property name ="timeBetweenEvictionRunsMillis" value ="60000" /> <property name ="minEvictableIdleTimeMillis" value ="300000" /> <property name ="validationQuery" value ="${jdbc.testSql}" /> <property name ="testWhileIdle" value ="true" /> <property name ="testOnBorrow" value ="false" /> <property name ="testOnReturn" value ="false" /> <property name ="filters" value ="stat" /> </bean > </beans >
配置 Druid 监控中心
Druid 提供了大量的监控数据,只需要在 web.xml 中配置一个 Servlet 就可以方便的查看这些信息。
修改 web.xml 配置文件,增加 Druid 提供的 Servlet
1 2 3 4 5 6 7 8 <servlet > <servlet-name > DruidStatView</servlet-name > <servlet-class > com.alibaba.druid.support.http.StatViewServlet</servlet-class > </servlet > <servlet-mapping > <servlet-name > DruidStatView</servlet-name > <url-pattern > /druid/*</url-pattern > </servlet-mapping >
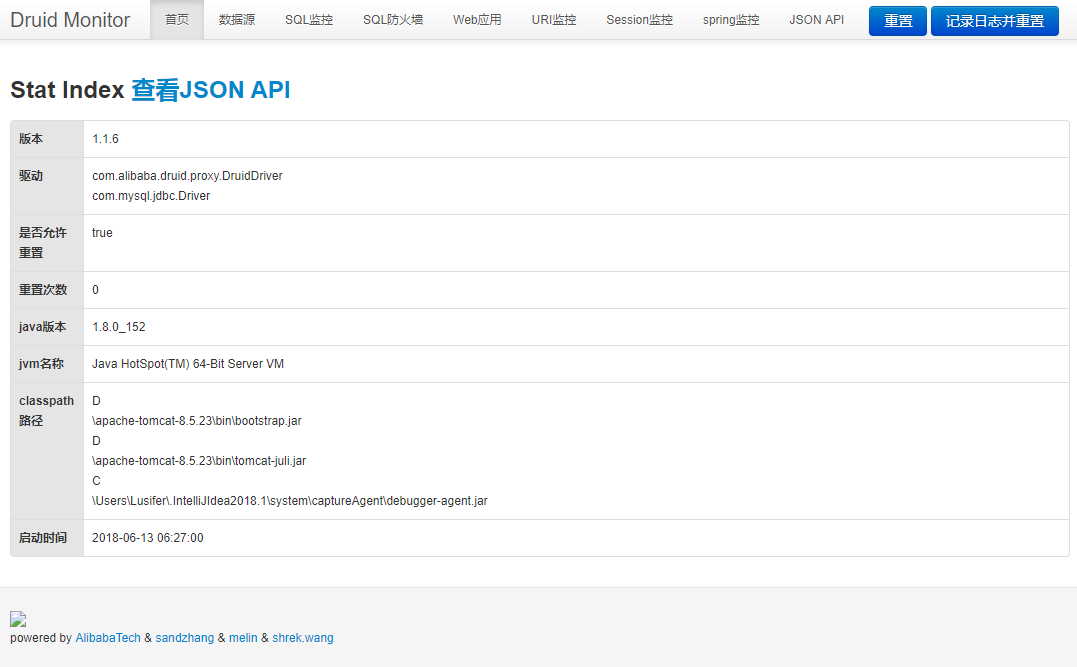
打开浏览器,输入:http://localhost:8080/druid/index.html 浏览器显示效果如下:
If you like this blog or find it useful for you, you are welcome to comment on it. You are also welcome to share this blog, so that more people can participate in it. If the images used in the blog infringe your copyright, please contact the author to delete them. Thank you !