Nexus 仓库分类
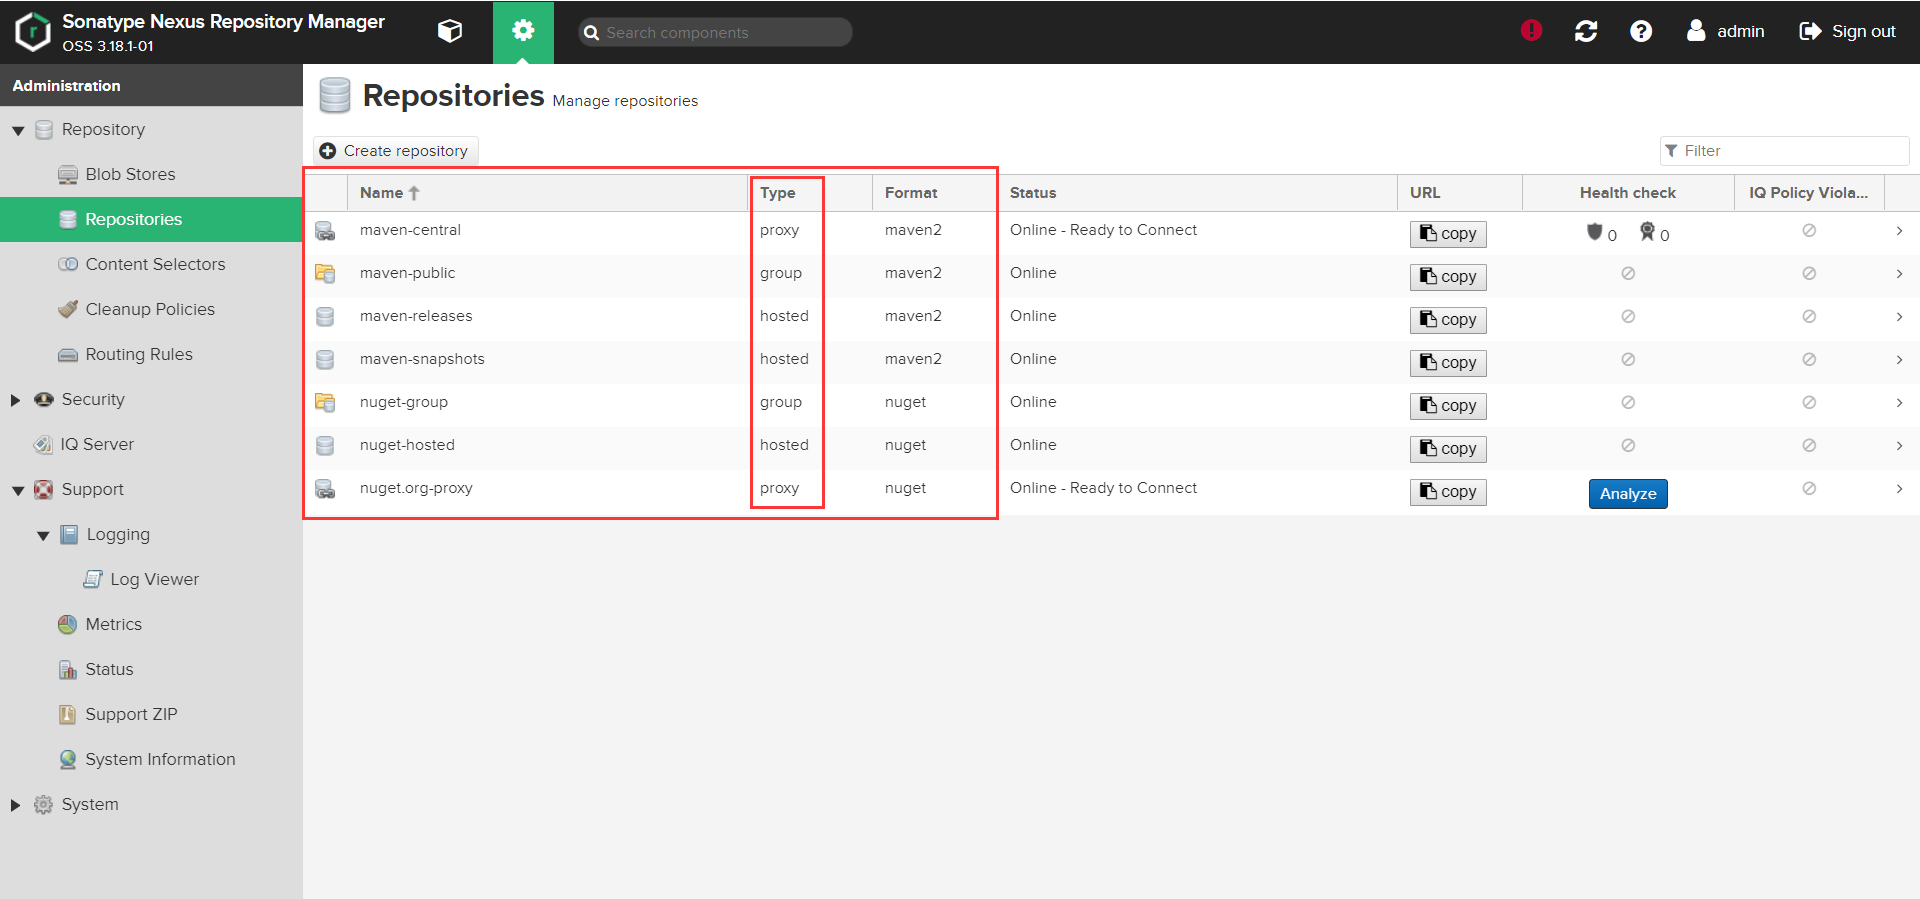
代理仓库(proxy)
意为第三方仓库,如:
maven-central:默认maven中央仓库代理nuget.org-proxy
版本策略(Version Policy):
Release: 正式版本Snapshot: 快照版本Mixed: 混合模式
布局策略(Layout Policy):
Strict:严格Permissive:宽松
宿主仓库(hosted)
存储本地上传的组件和资源的,如:
maven-releasesmaven-snapshotsnuget-hosted
部署策略(Deployment Policy):
Allow Redeploy:允许重新部署Disable Redeploy:禁止重新部署Read-Only:只读
仓库组(group)
通常包含了多个代理仓库和宿主仓库,在项目中只要引入仓库组就可以下载到代理仓库和宿主仓库中的包,如:
maven-publicnuget-group
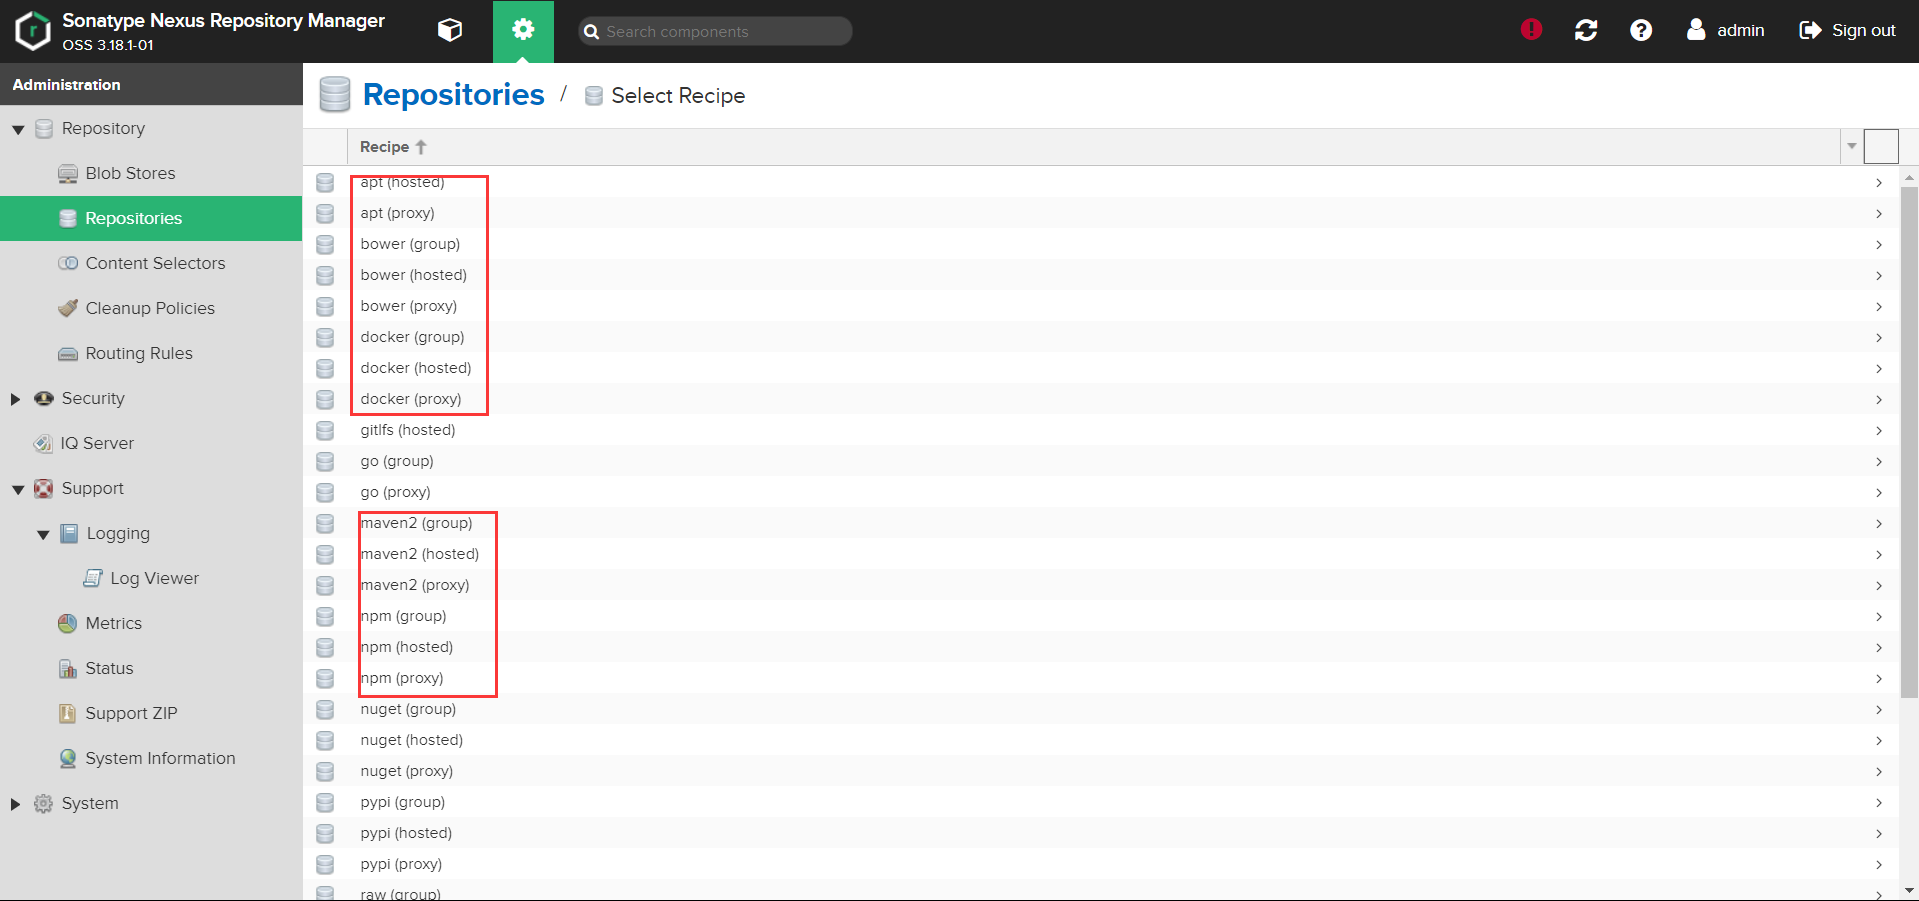
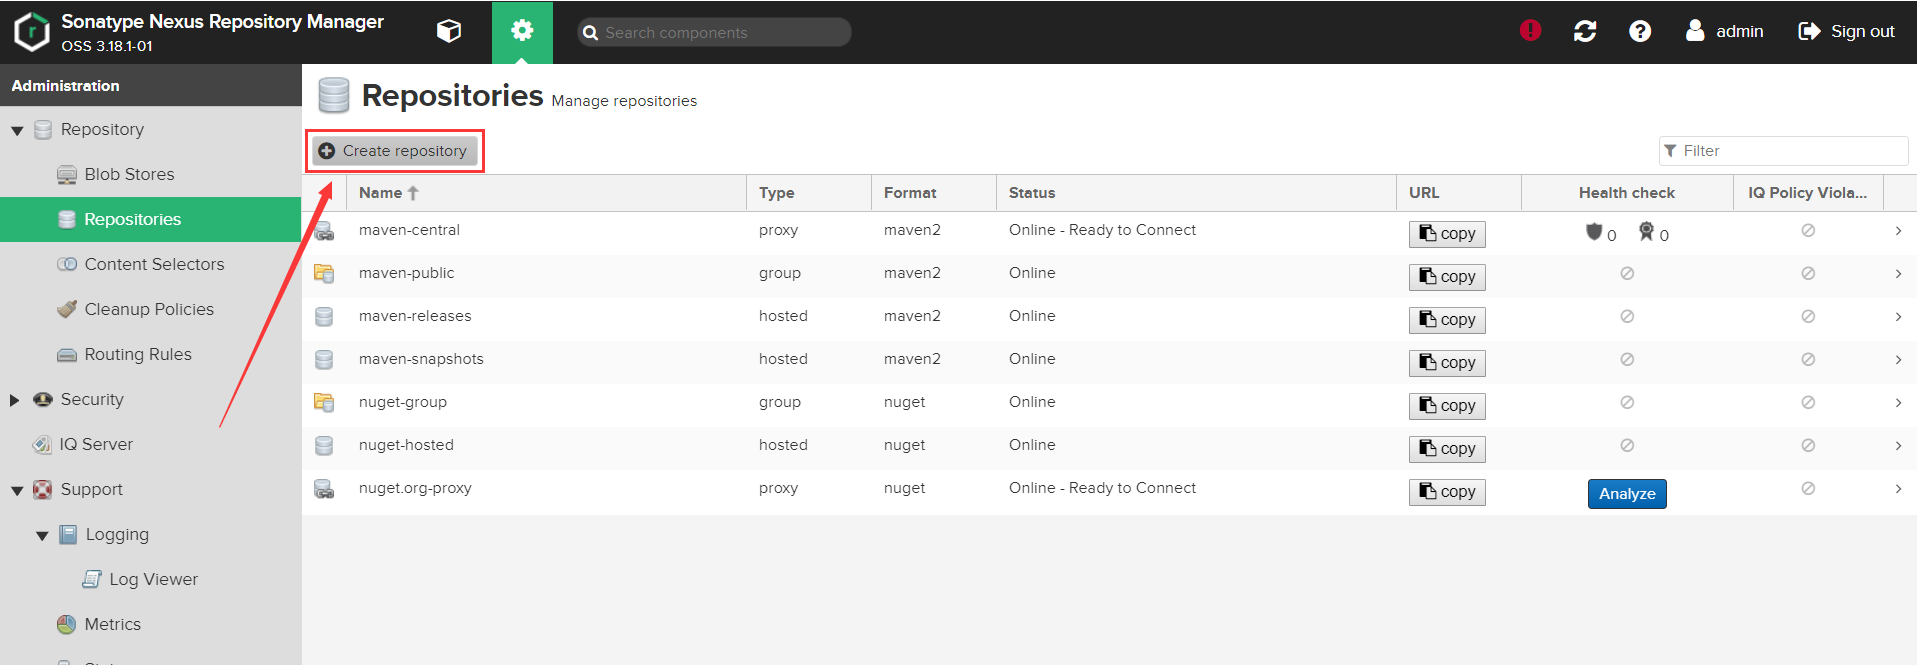
Nexus 创建仓库
Nexus 不仅仅可以创建 maven 仓库,同时还可以创建 apt、bower、docker、npm 等仓库。本文以 maven 仓库举例。
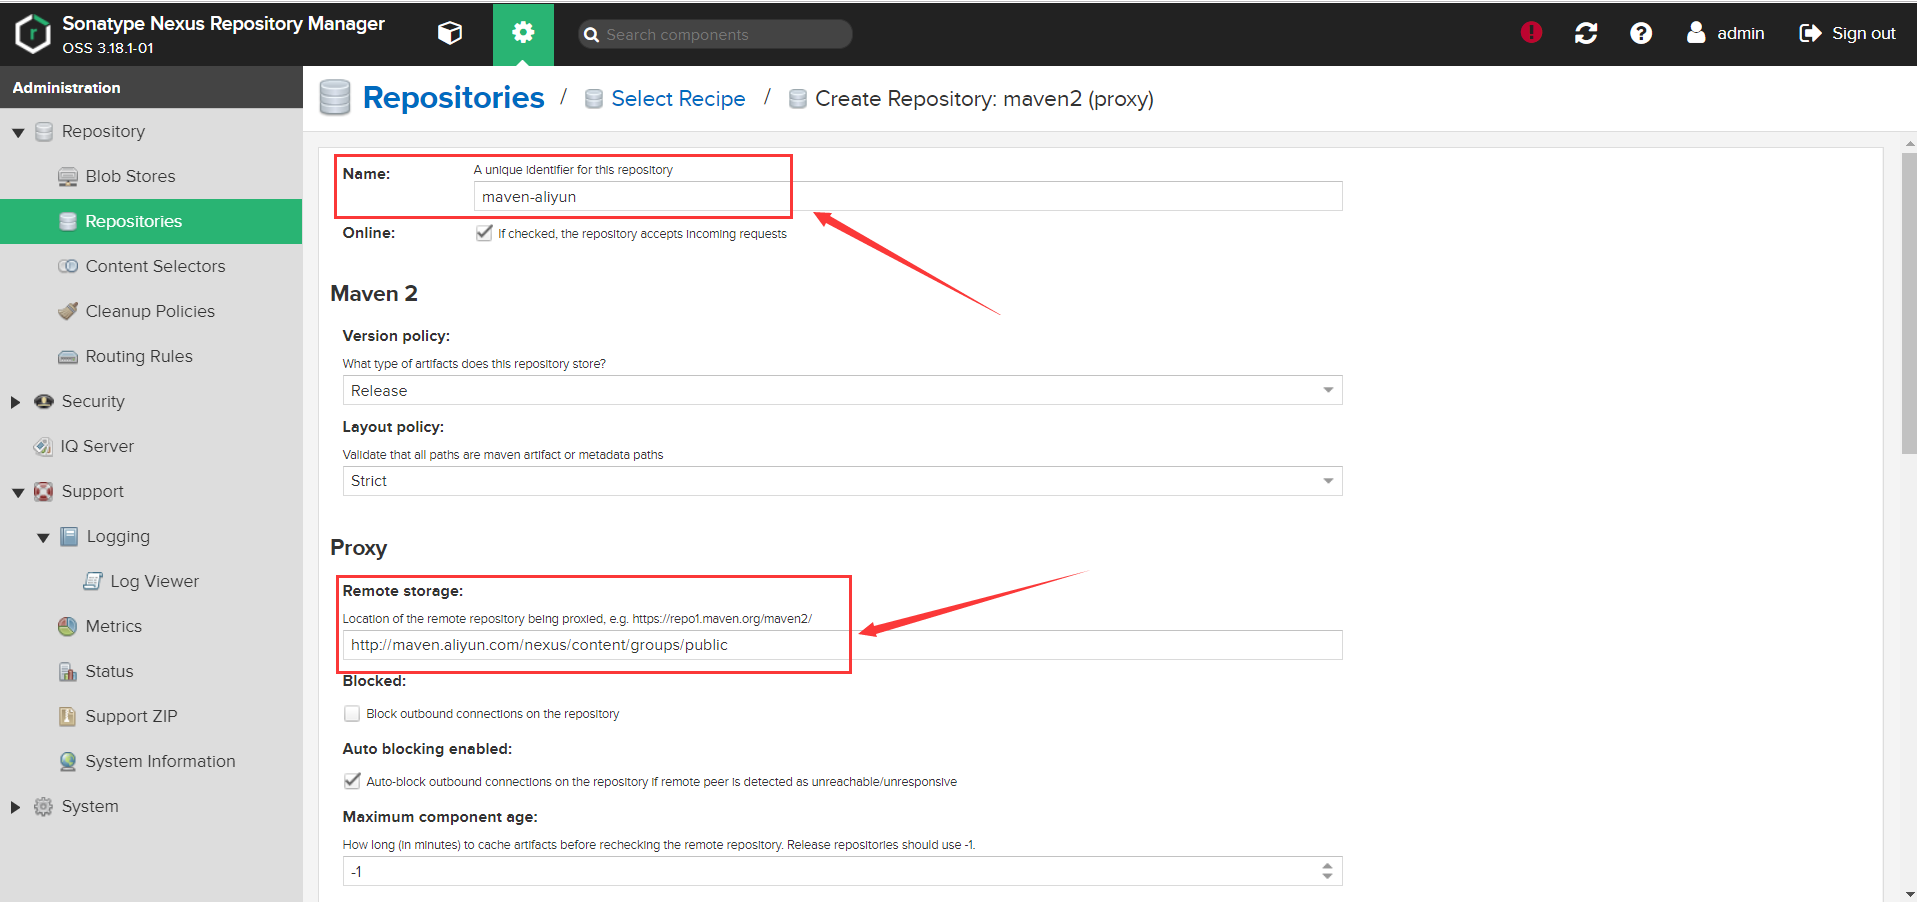
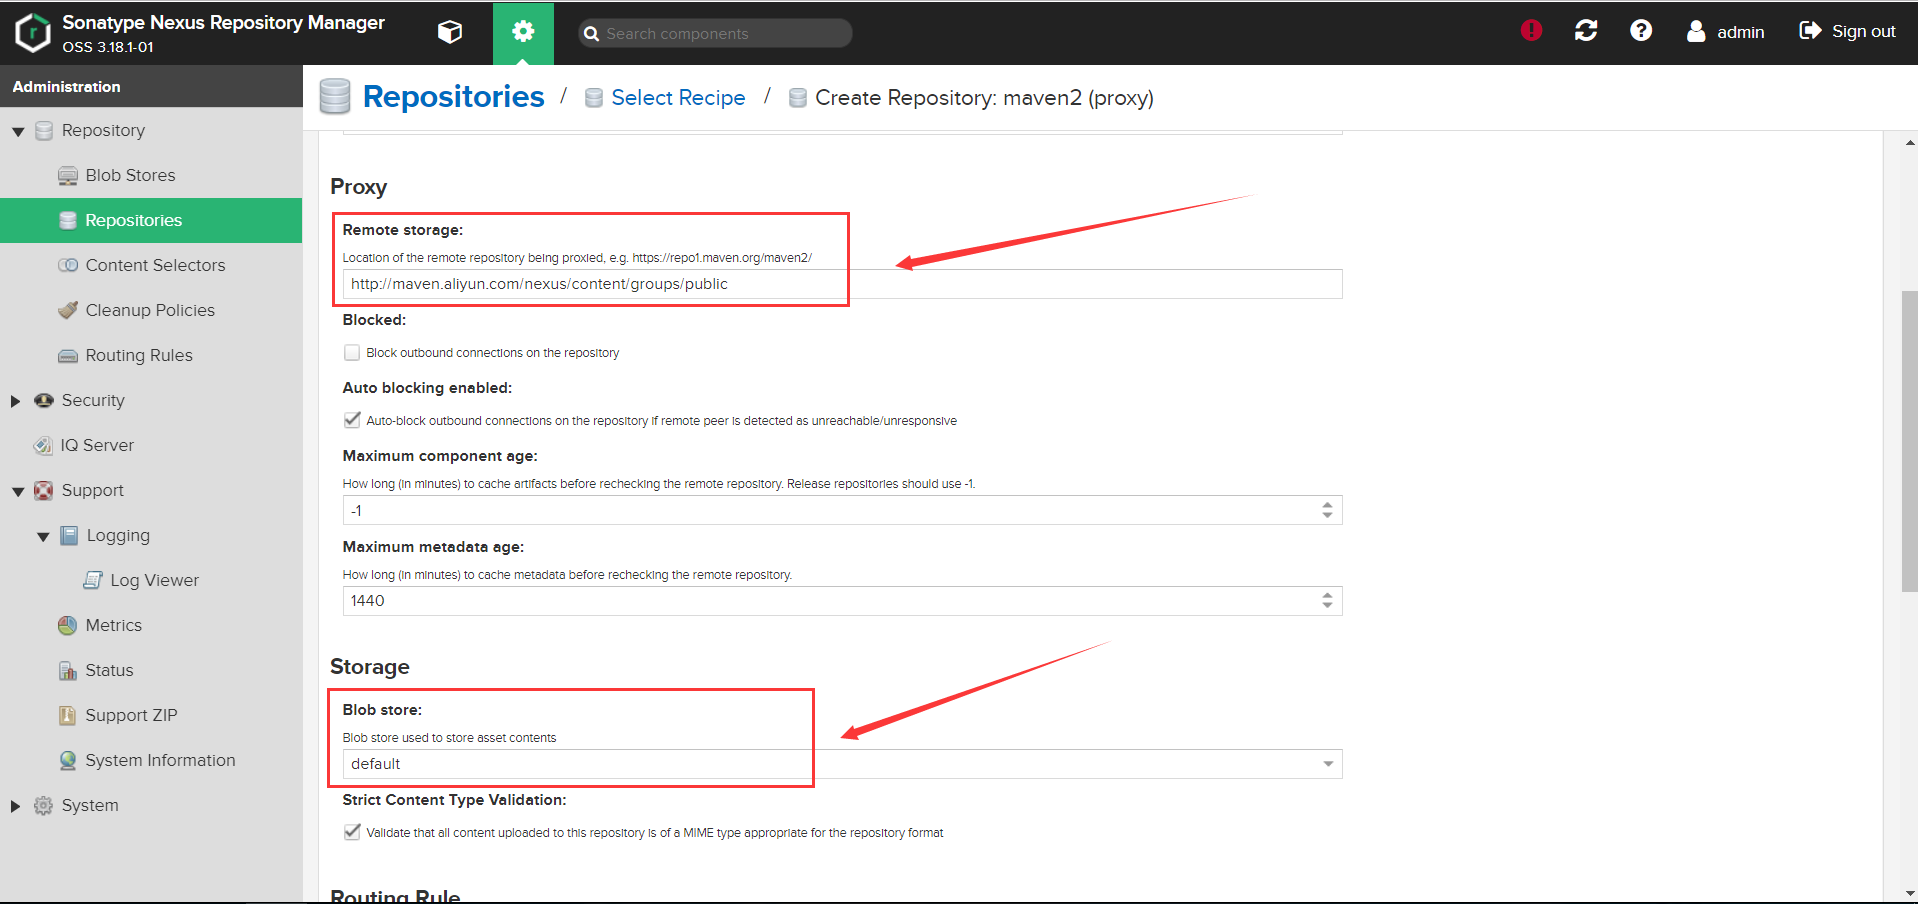
创建 proxy 类型 Repositories
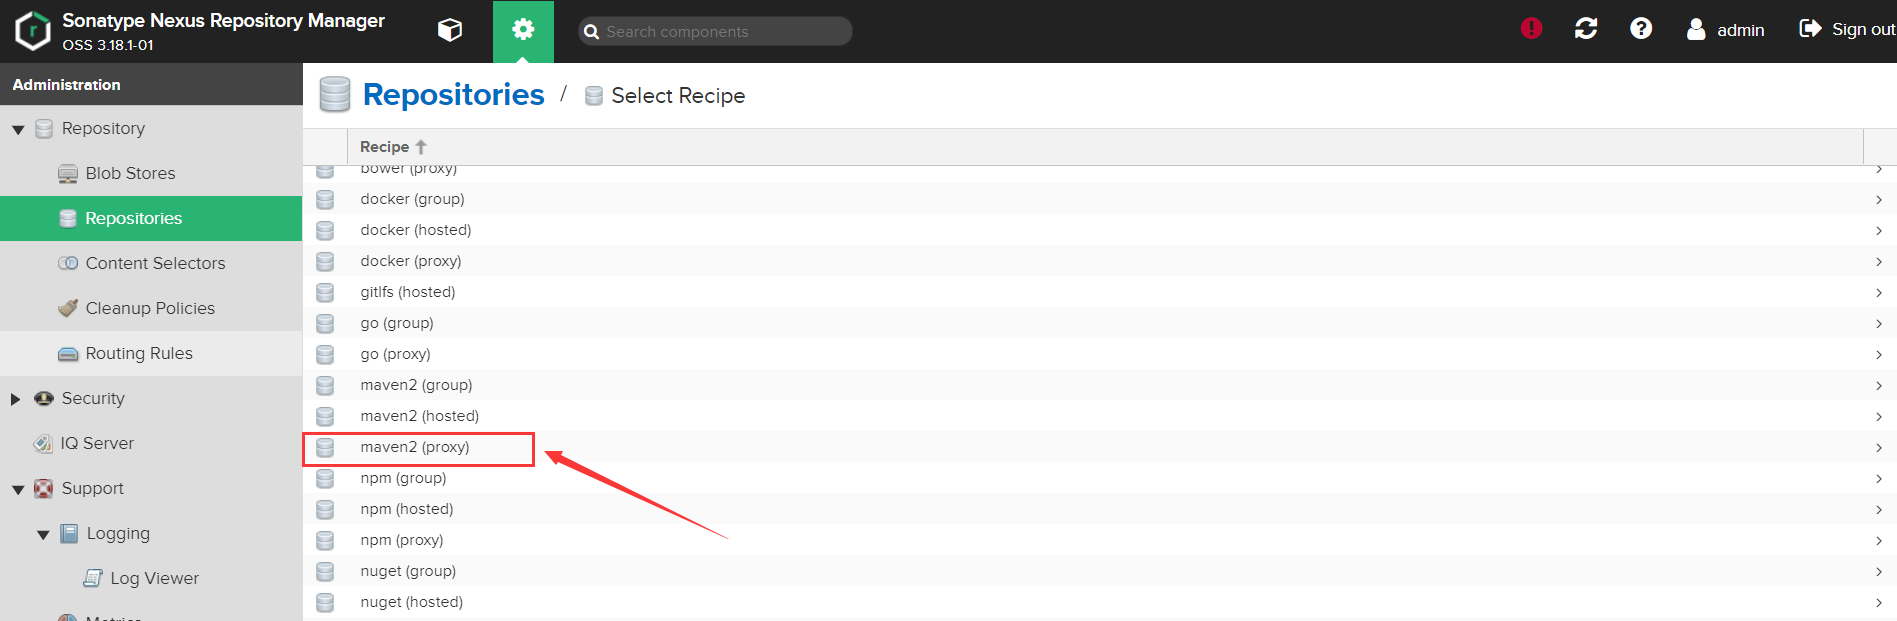
填写详细信息
Name:maven-aliyun(为代理起个名字)Remote Storage:http://maven.aliyun.com/nexus/content/groups/public (代理的地址,Maven 仓库的地址)Blob Store: default (代理下载包的存放路径)
创建 hosted 类型 Repositories
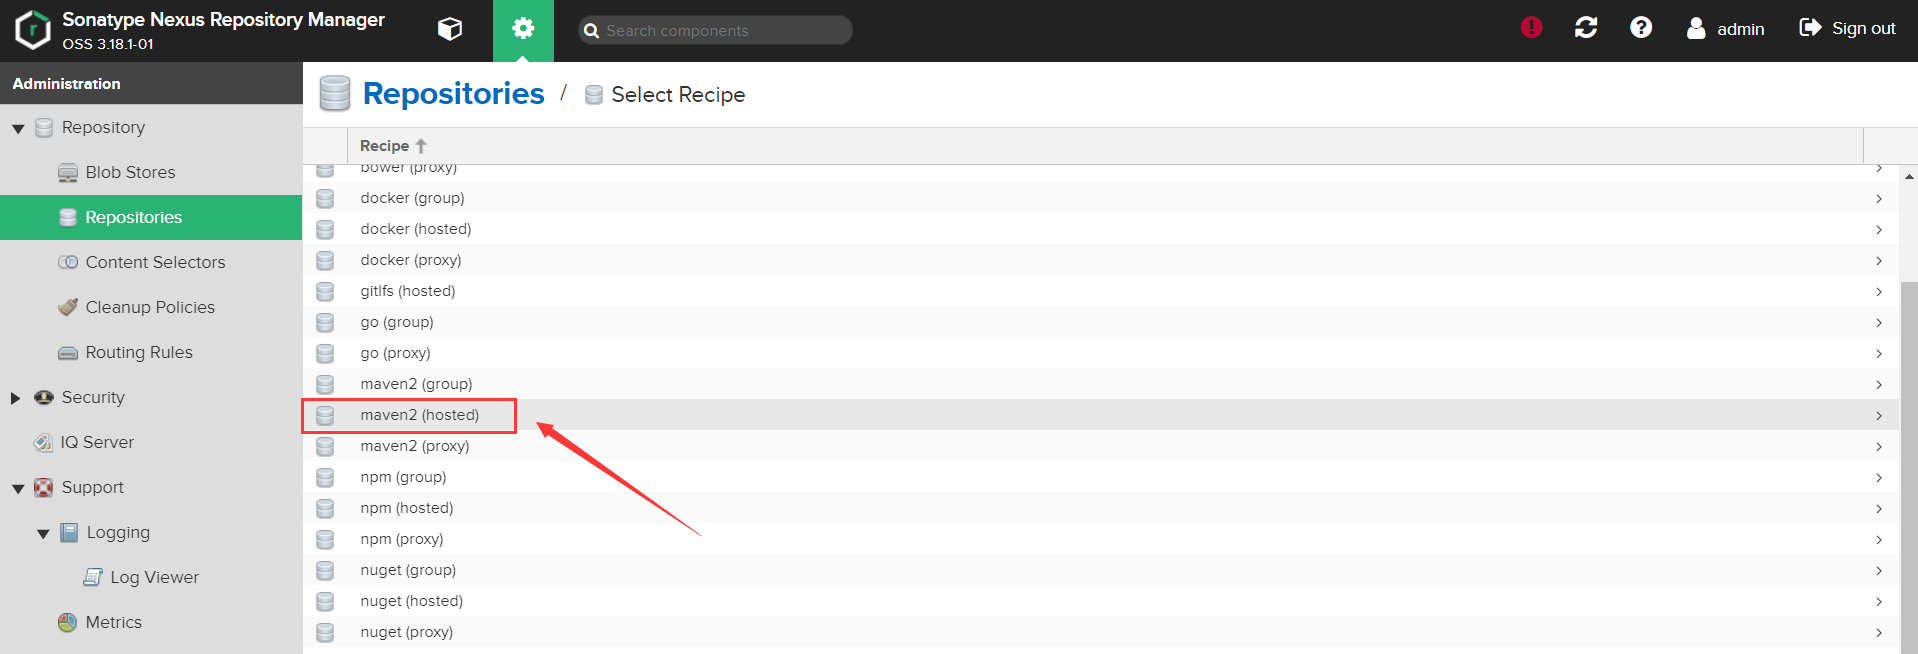
填写详细信息
根据具体场景选择相应策略:
Version Policy(版本策略):Release、Snapshot、MixedLayout Policy(布局策略):Strict、PermissiveDeployment Policy(部署策略):Allow Redeploy、Disable Redeploy、Read-Only

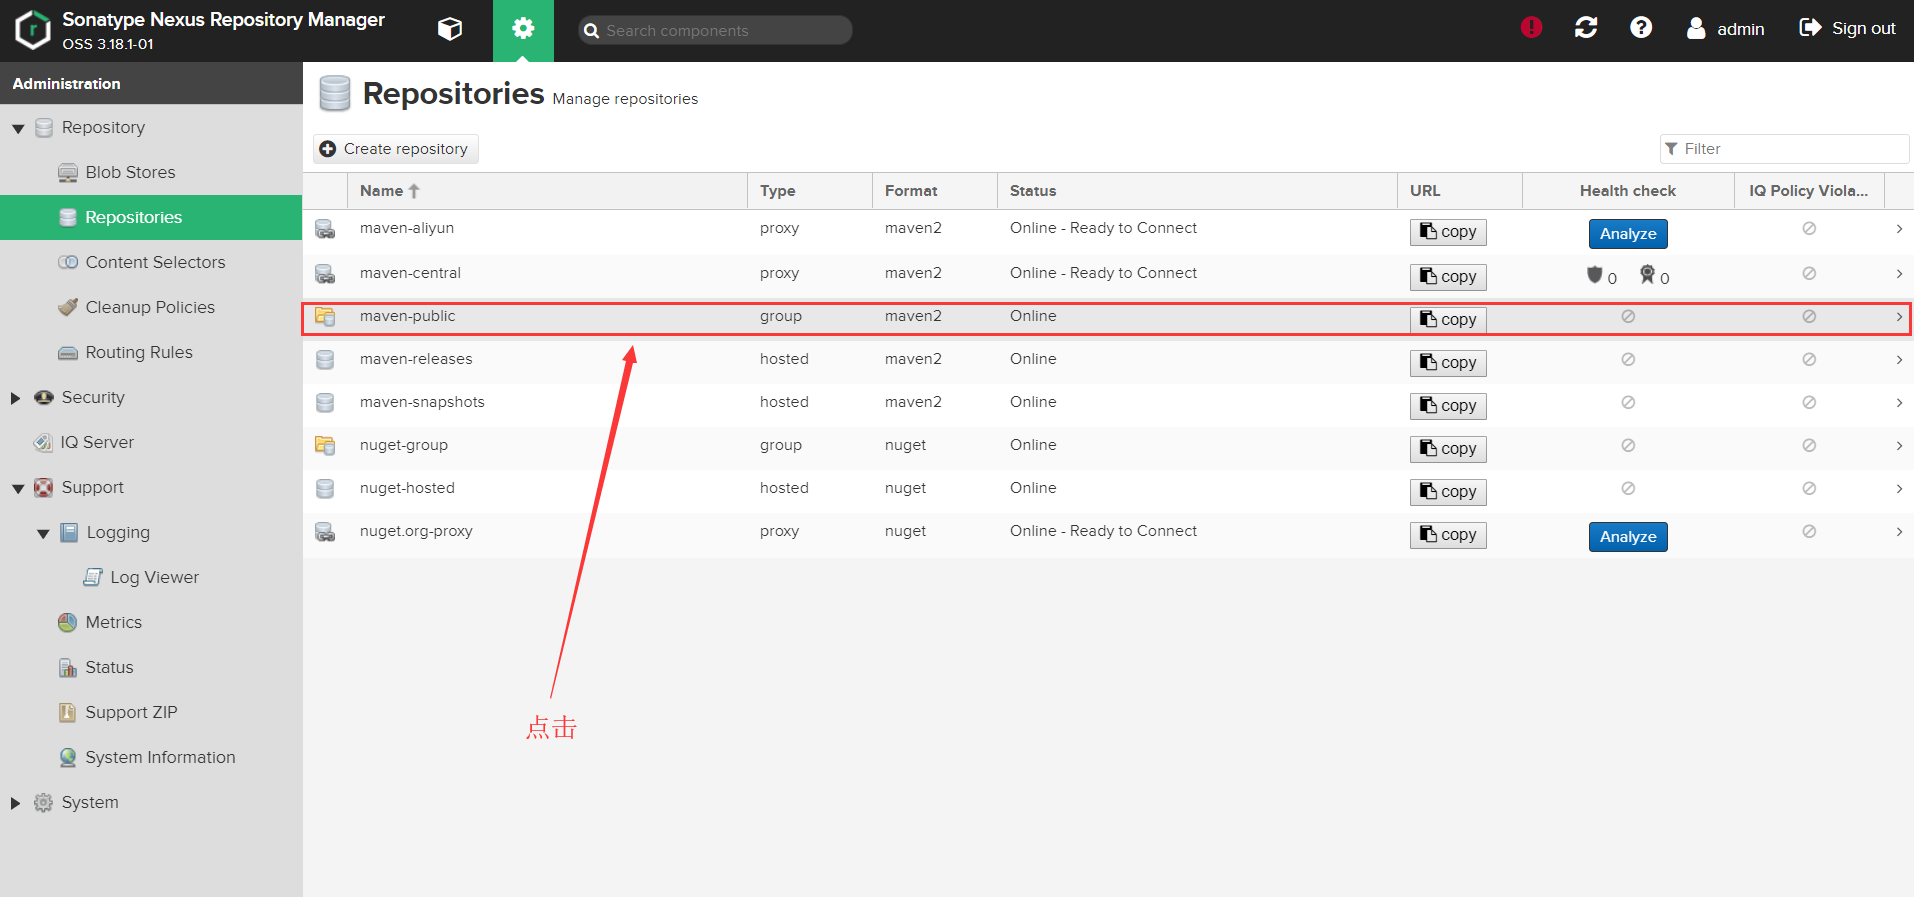
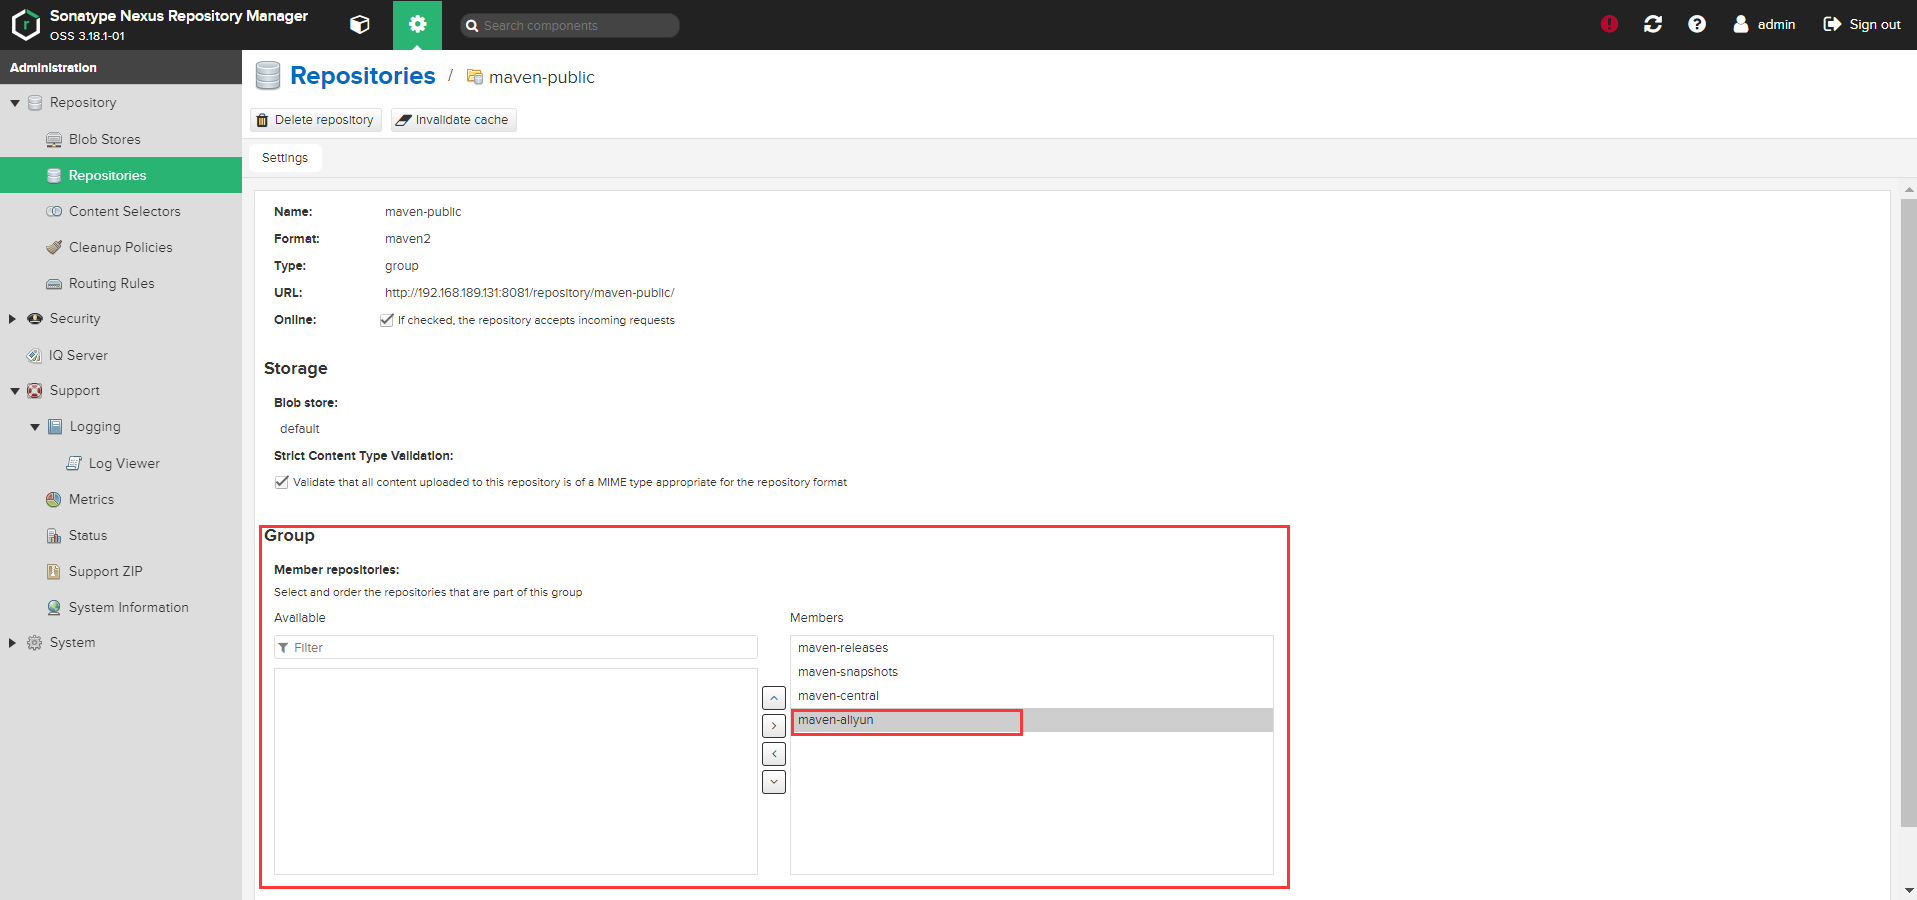
修改 group 类型 Repositories
将 maven-aliyun和新创建 hosted 类型仓库添加到 maven-public 中,常用的库靠前(注意:hosted 必须高于 porxy,否则每当访问 maven-public 时 porxy 需要检查远程存储库,这大大增加了开销)
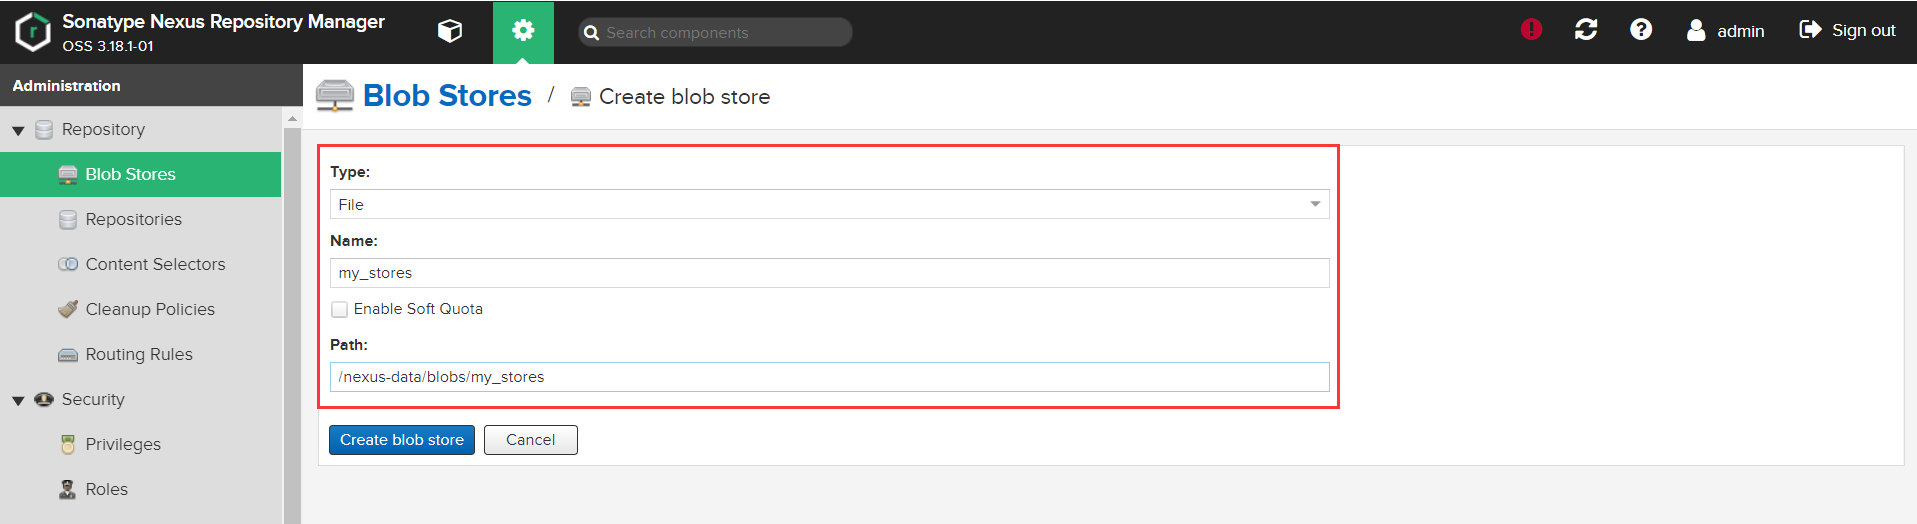
Nexus 创建存储区
Blob Stores:文件存储的地方,创建一个目录的话,对应文件系统的一个目录,如图所示
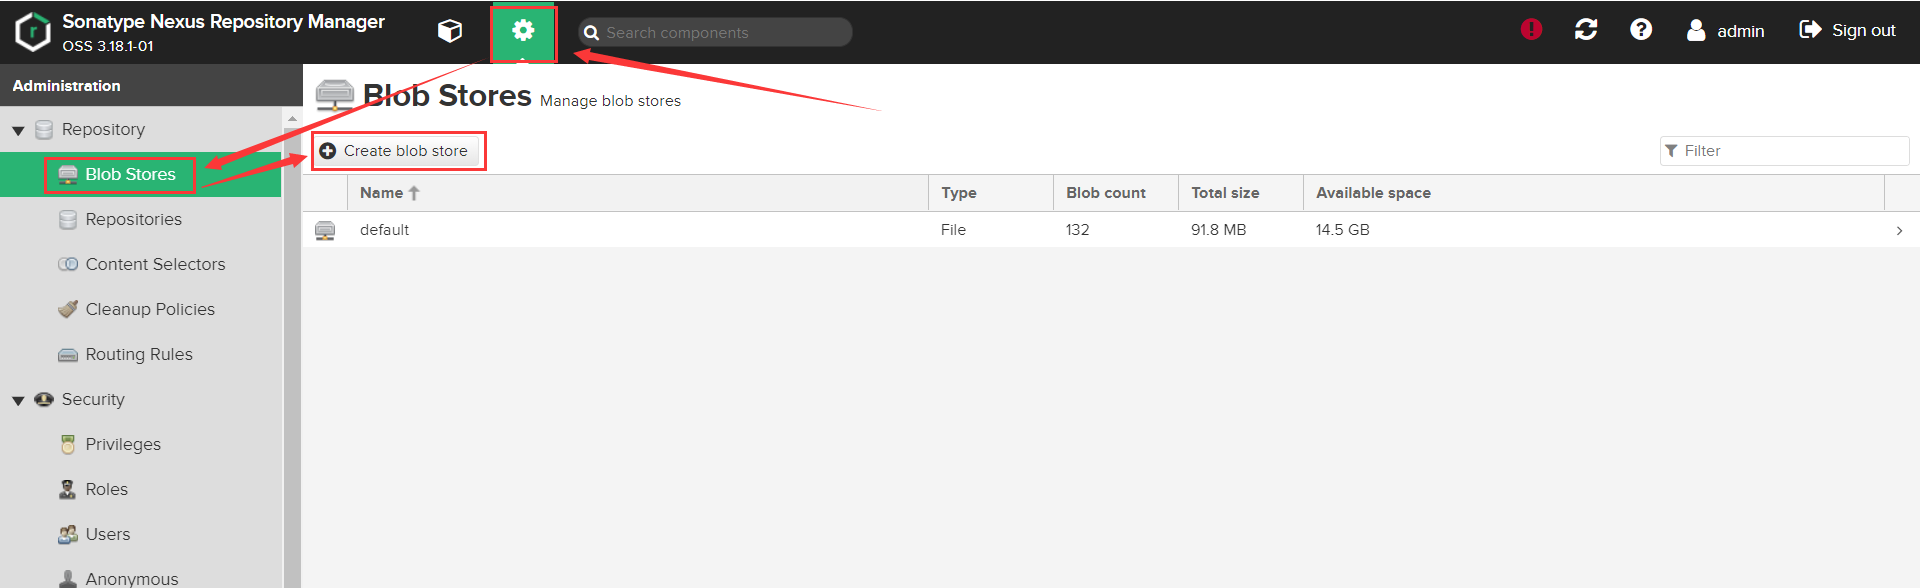
注:默认存储在 default 下:/nexus-data/blobs/default
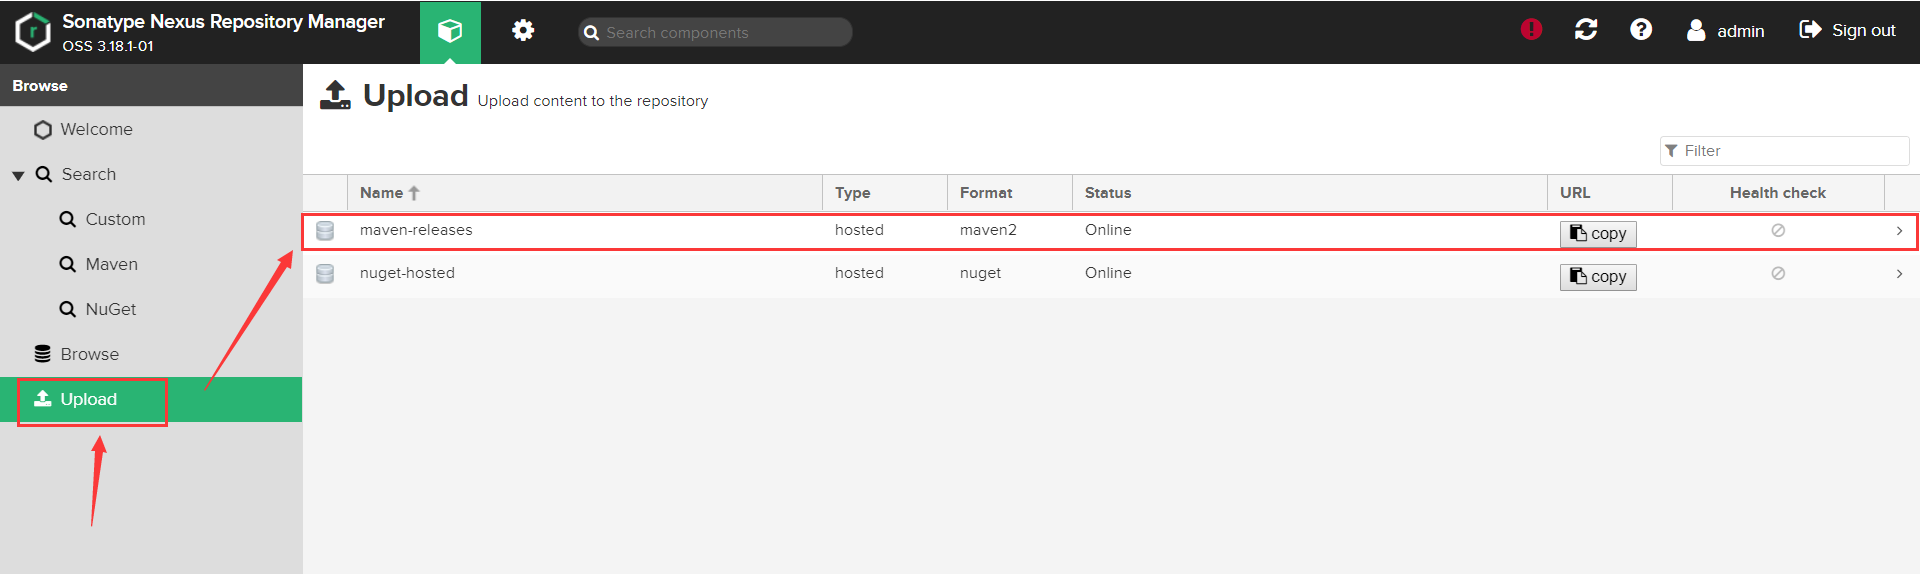
Nexus 上传第三方 JAR 包
Nexus 支持页面上传
(Nexus 3.15 版本后支持页面上传)
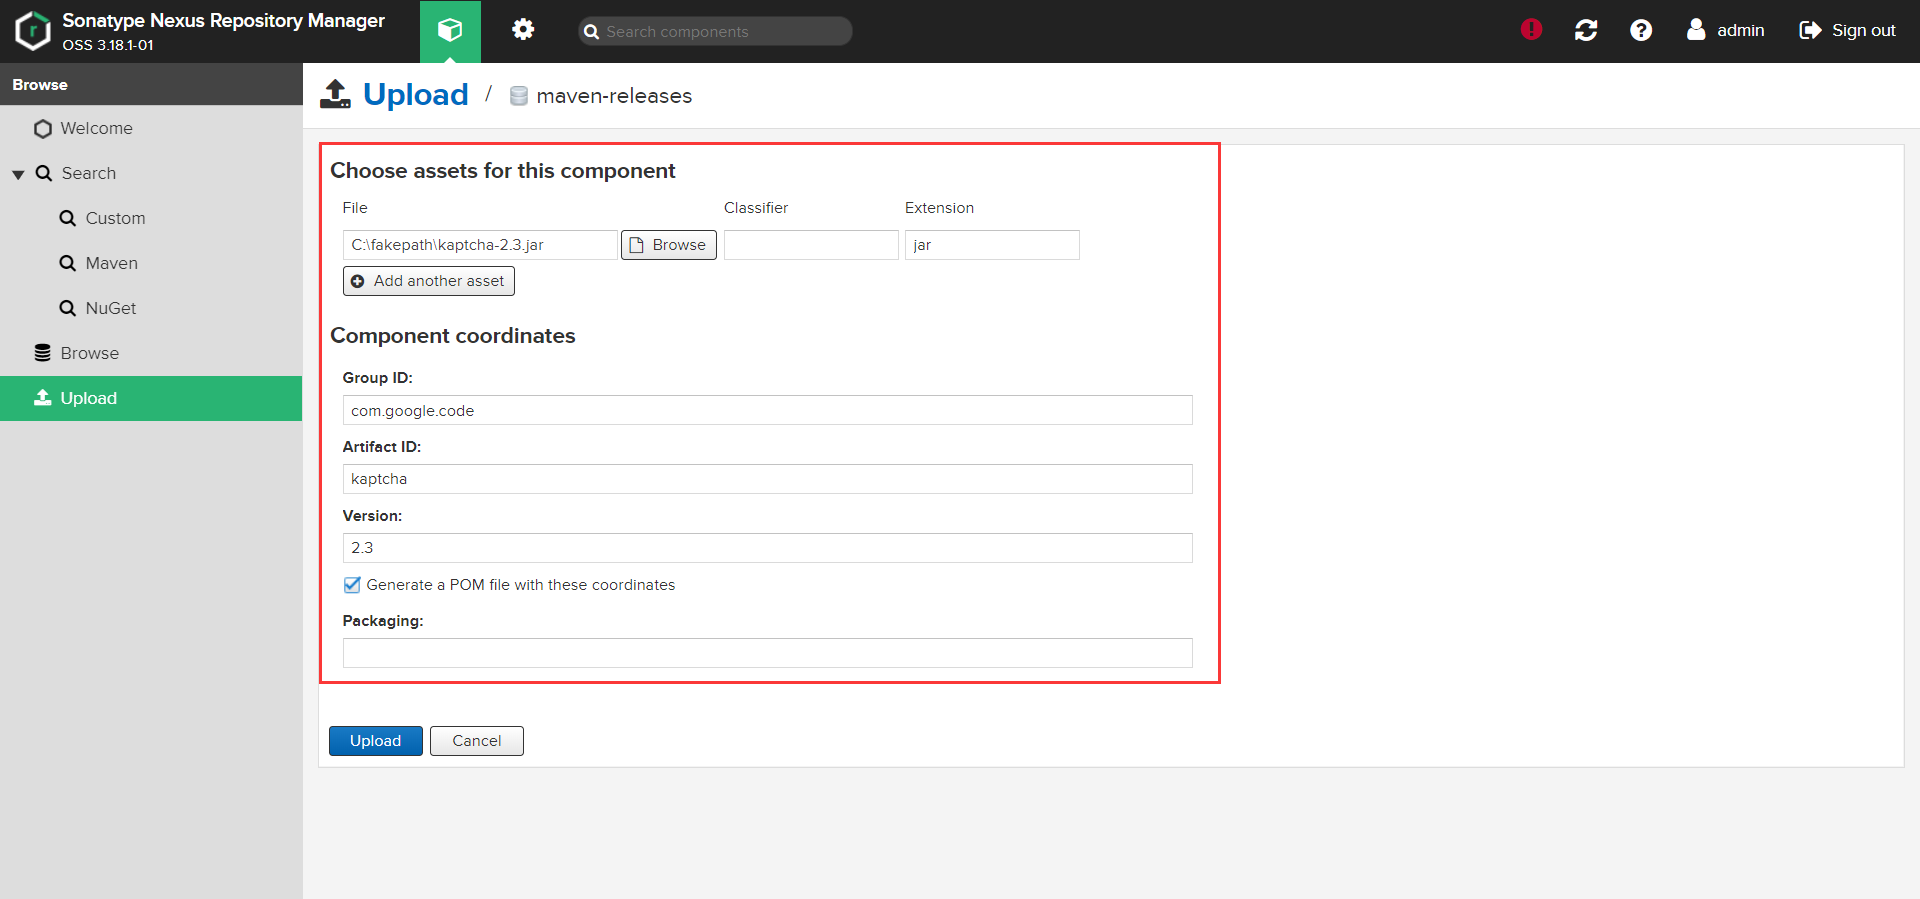
或采用 maven 命令上传
1 | mvn deploy:deploy-file -DgroupId=com.google.code -DartifactId=kaptcha -Dversion=2.3 -Dpackaging=jar -Dfile=F:\kaptcha-2.3.jar -Durl=http://ip:8081/repository/maven-3rd/ -DrepositoryId=nexus-releases |
注意事项:
- 建议在上传第三方
JAR包时,创建单独的第三方JAR包管理仓库,便于管理有维护。(maven-3rd) -DrepositoryId=nexus-releases对应的是settings.xml中Servers配置的ID名称。(授权)
更多 Nexus 使用说明:https://help.sonatype.com/repomanager3/release-notes
在项目中使用 Maven 私服
配置认证信息
在 Maven settings.xml 中添加 Nexus 认证信息(servers 节点下):
1 | <server> |
Snapshots 与 Releases 的区别
nexus-releases: 用于发布 Release 版本nexus-snapshots: 用于发布 Snapshot 版本(快照版)
Release 版本与 Snapshot 定义如下:
1 | Release: 1.0.0/1.0.0-RELEASE |
- 在项目
pom.xml中设置的版本号添加SNAPSHOT标识的都会发布为SNAPSHOT版本,没有SNAPSHOT标识的都会发布为RELEASE版本。 SNAPSHOT版本会自动加一个时间作为标识,如:1.0.0-SNAPSHOT发布后为变成1.0.0-SNAPSHOT-20180522.123456-1.jar
配置自动化部署
在 pom.xml 中添加如下代码:
1 | <distributionManagement> |
注意事项:
ID名称必须要与settings.xml中 Servers 配置的ID名称保持一致。- 项目版本号中有
SNAPSHOT标识的,会发布到 Nexus Snapshots Repository, 否则发布到 Nexus Release Repository,并根据 ID 去匹配授权账号。
配置代理仓库
1 | <repositories> |
If you like this blog or find it useful for you, you are welcome to comment on it. You are also welcome to share this blog, so that more people can participate in it. If the images used in the blog infringe your copyright, please contact the author to delete them. Thank you !